Work with Layers
This workflow covers the practical side of layers — creating, switching, attaching, and organizing them for multi-level roofs. Read Layers first for the concept.
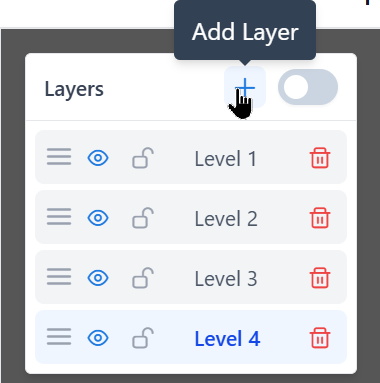
Create a new layer
Open the Layers panel (top-left of the editor) and click the + icon. A new layer appears below the existing ones with an automatic name (Level 2, Level 3, and so on) and becomes the active layer.
INFO
Layer names are assigned by the system in the order of creation: Level 1, Level 2, Level 3, and so on. Custom renaming is not available in the current version.
Switch active layer
Click any layer name in the panel to make it active. The name becomes highlighted and all new edges you draw are added to this layer.
Recommendation
Always check the active layer before drawing. A common mistake is drawing dormer edges on the main-roof layer.
Show all layers vs single layer
- Default view: only the active layer is fully visible. Other layers are dimmed or hidden.
- Show All Layers toggle (at the top of the panel): displays every layer at full opacity.
Use Show All when reviewing a multi-level roof end-to-end. Switch back to single-layer view when drawing — it reduces visual noise.
Attach a second roof plane to an existing one
When an upper-level plane overhangs something already drawn on a lower layer, the two are normally connected at shared vertices — it keeps the plan view clean and makes the report visually consistent.
Typical scenarios:
- a two-story house with a porch — porch on
Level 1, the front of the main roof (which overhangs the porch) onLevel 2, both anchored at the porch's front corners - a garage with a bump-out — lower bump-out on
Level 1, the main garage's front plane (overhanging the bump-out) onLevel 2 - a cupola, tower, or penthouse sitting on top of the main roof — main roof on
Level 1, upper structure onLevel 2
Sharing vertices between layers is not strictly required for the report to be correct — each layer is measured independently. But visual alignment makes the result much cleaner.
General steps (bottom to top)
- On
Level 1, finish drawing all planes that don't overhang anything else — classify edges, set pitch. - Create
Level 2— it becomes the active layer automatically, and theLevel 1geometry is hidden on the canvas. - Click Show All Layers in the Layers panel so the
Level 1geometry is visible (dimmed) while you draw onLevel 2. - Start drawing the overhanging plane. At every corner that should coincide with a
Level 1vertex, move the cursor to that vertex — it highlights green (cross-layer snap). - Click to place. The app creates a duplicate node on
Level 2at the same coordinates. - Continue until the loop closes. A new facet appears on
Level 2. - Classify the edges of the new plane and set its pitch.
TIP
Without Show All Layers the lower geometry is invisible while you're on Level 2. Snap still works (you could blindly hit a Level 1 vertex if you knew where it is), but it's far easier to enable Show All Layers and target visible corners.
When the bump-out loop closes, a new facet appears on Level 2 — independent from the garage on Level 1 but sharing vertices with it.
Locking finished sections
Once a layer is complete and classified, lock it. The trash/lock icons appear when hovering over the layer name.
A locked layer:
- cannot have edges added, moved, or deleted
- still snaps for attachment from other layers
- shows a small lock icon next to its name
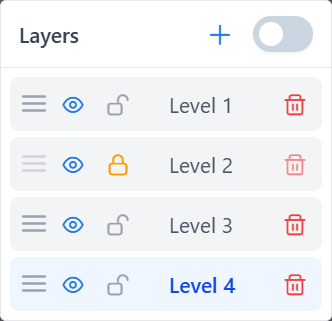
Unlock at any time by clicking the lock icon again.
Hide and show layers
The eye icon toggles visibility. Hidden layers:
- are not drawn on the canvas
- are still part of the project and the report
- can still interact with snap when Show All Layers is on
Use hiding to temporarily declutter the view — for example, hide the base roof while fine-tuning a dormer.
Delete a layer
Click the trash icon next to a layer name. A confirmation dialog appears asking you to confirm — deletion cannot be undone.
Important
Deleting a layer removes all its nodes, edges, and facets. If you're not sure, hide or lock the layer instead.
The last remaining layer cannot be deleted — there must always be at least one layer.
Reorder layers
Drag a layer in the panel to change its order. Ordering affects how layers are displayed but does not change data.
Typical workflows
Single-level house
- Use
Level 1— the only layer that exists in a fresh project. - Trace the full roof outline.
- Classify edges, assign pitch.
- Generate the report. No additional layers needed.
Garage with a bump-out
Bump-out is the lower, smaller structure; its roof tucks under the main garage overhang.
- On
Level 1— trace the bump-out first (it's the lower plane). - Classify the bump-out edges and set its pitch.
- Add
Level 2, enable Show All Layers. - Trace the main garage roof on
Level 2. The front plane of the main roof overhangs the bump-out. Snap its matching corners to the bump-out's vertices onLevel 1— cross-layer snap creates duplicate nodes onLevel 2. - Classify the main garage edges and set its pitch.
- Review with Show All Layers — both structures should be visually aligned in plan view.
Two-story house with a front porch
The main second-floor roof has a front that overhangs a first-floor porch.
- On
Level 1— trace the porch (first floor) and the back part of the main roof (which doesn't overhang the porch). Both fit on the same layer because they don't overhang each other. - Classify edges and set pitch for both sections.
- Add
Level 2, enable Show All Layers. - Trace the front part of the main roof on
Level 2. Snap its edge where it overhangs the porch to the porch's top vertices onLevel 1. - Classify edges and set pitch for the front plane.
Cupola, tower, or penthouse on top
- On
Level 1— full main roof, classified, pitched. - Add
Level 2, enable Show All Layers. - Trace the upper structure. Snap its base corners to the main roof vertices on
Level 1if they share points. - Classify and set pitch for the upper section.
Tips
- Create layers as you need them, not up front.
- Remember which
Level Nis which part of the roof — the names are sequential, not descriptive. - Lock a layer as soon as you finish it to prevent accidental edits.
- Use Show All Layers before generating the report to verify the overall roof.
Common issues
New edges go to the wrong layer
The active layer is not what you think. Click the correct layer in the panel before drawing.
Snap to another layer doesn't work
- The target layer may be hidden. Make it visible or enable Show All Layers.
- The snap radius may not reach the target node. Zoom in.
A dormer and base roof merged into one facet
Both loops are on the same layer. Separate them: move one structure's edges to a different layer, or redraw on the right layer.
What to read next
- Layers — concept reference
- Draw edges
- Edges and facets