Edge Types
Every edge in Roof Layout Studio has a type. The type tells the app what a line represents in the real roof and how it should affect area, slope, and report calculations.
This page lists all edge types, their color codes, and when to use each.
Why edge types matter
Edge types are not just labels — they affect:
- facet slope direction — the app infers water flow from ridges and eaves
- edge length in reports — hips, valleys, and ridges are reported separately
- slope factors — a correctly classified hip has a different 3D length than its flat projection
- visual clarity — color-coded edges make the roof structure readable
Leaving edges as unspecified blocks automatic slope direction detection and produces incomplete reports.
The twelve types
Eaves
Color: green
The lowest horizontal edges of a roof — where water drips off. Typically the edge above the gutter.
Use Eaves for any edge at the bottom of a roof plane that drains to open air.
Ridges
Color: dark green
The top horizontal edges of a roof — where two facets meet at the peak.
Use Ridges for the highest lines where water flows away on both sides.
Hips
Color: purple
Sloped edges running from the ridge down to an eave corner, where two adjacent roof planes meet at an outward angle.
Common on hip roofs and half-hip roofs.
Valleys
Color: red-orange
Sloped edges where two roof planes meet at an inward angle — water collects and runs down these lines.
Valleys are usually found where two perpendicular roof sections join.
Rakes
Color: yellow
Sloped edges along the gable ends of a roof — where the roof overhangs the side wall and you can see the underside of the shingles.
Use Rakes for any non-horizontal edge at the edge of a gable.
High Eave
Color: teal
The upper free edge of a shed or mono-slope roof.
Use High Eave when the roof plane drains away from an upper open edge rather than from a ridge.
Parapet
Color: orange (dashed)
Edges related to parapet conditions.
Use Parapet when the roof edge terminates at or interacts with a parapet condition.
Transitions
Color: magenta
Horizontal edges inside a roof where the pitch changes but the roof continues in the same direction — for example, a mansard transition from a steep lower slope to a shallow upper slope.
Less common but important for complex roofs.
Wall flashing
Color: blue (dashed)
A horizontal or nearly horizontal edge where the roof meets a vertical wall — continuous along the wall length.
Use Wall flashing where a roof plane ends against a wall that continues higher.
Step flashing
Color: brown (dashed)
A sloped edge where the roof meets a vertical wall — usually next to a chimney or a dormer.
Use Step flashing where a roof plane runs up alongside a wall.
Other
Color: gray (dashed)
A deliberate custom or non-standard edge classification.
Use Other when the edge is intentionally classified but does not fit the available roof edge types.
Unspecified
Color: cyan
The default type for every new edge. It means "not yet classified".
This is different from Other: Unspecified means the edge still needs review, while Other means the user intentionally chose a custom/other edge type.
Important
Unspecified edges are visible but do not contribute meaningful data to the project. Always classify all edges before generating the report.
Summary table
| Type | Color | Typical use |
|---|---|---|
| Eaves | green | Roof bottom — gutter line |
| Ridges | dark green | Roof top — peak between two slopes |
| Hips | purple | Outward slope — between two adjacent planes |
| Valleys | red-orange | Inward slope — where two planes meet inward |
| Rakes | yellow | Gable side — sloped overhang edge |
| High Eave | teal | Upper free edge of a shed/mono-slope roof |
| Parapet | orange (dashed) | Parapet condition |
| Transitions | magenta | Pitch change within a continuous plane |
| Wall flashing | blue (dashed) | Roof-to-wall, horizontal |
| Step flashing | brown (dashed) | Roof-to-wall, sloped |
| Other | gray (dashed) | Intentional custom/other edge type |
| Unspecified | cyan | Default — classify before finalizing |
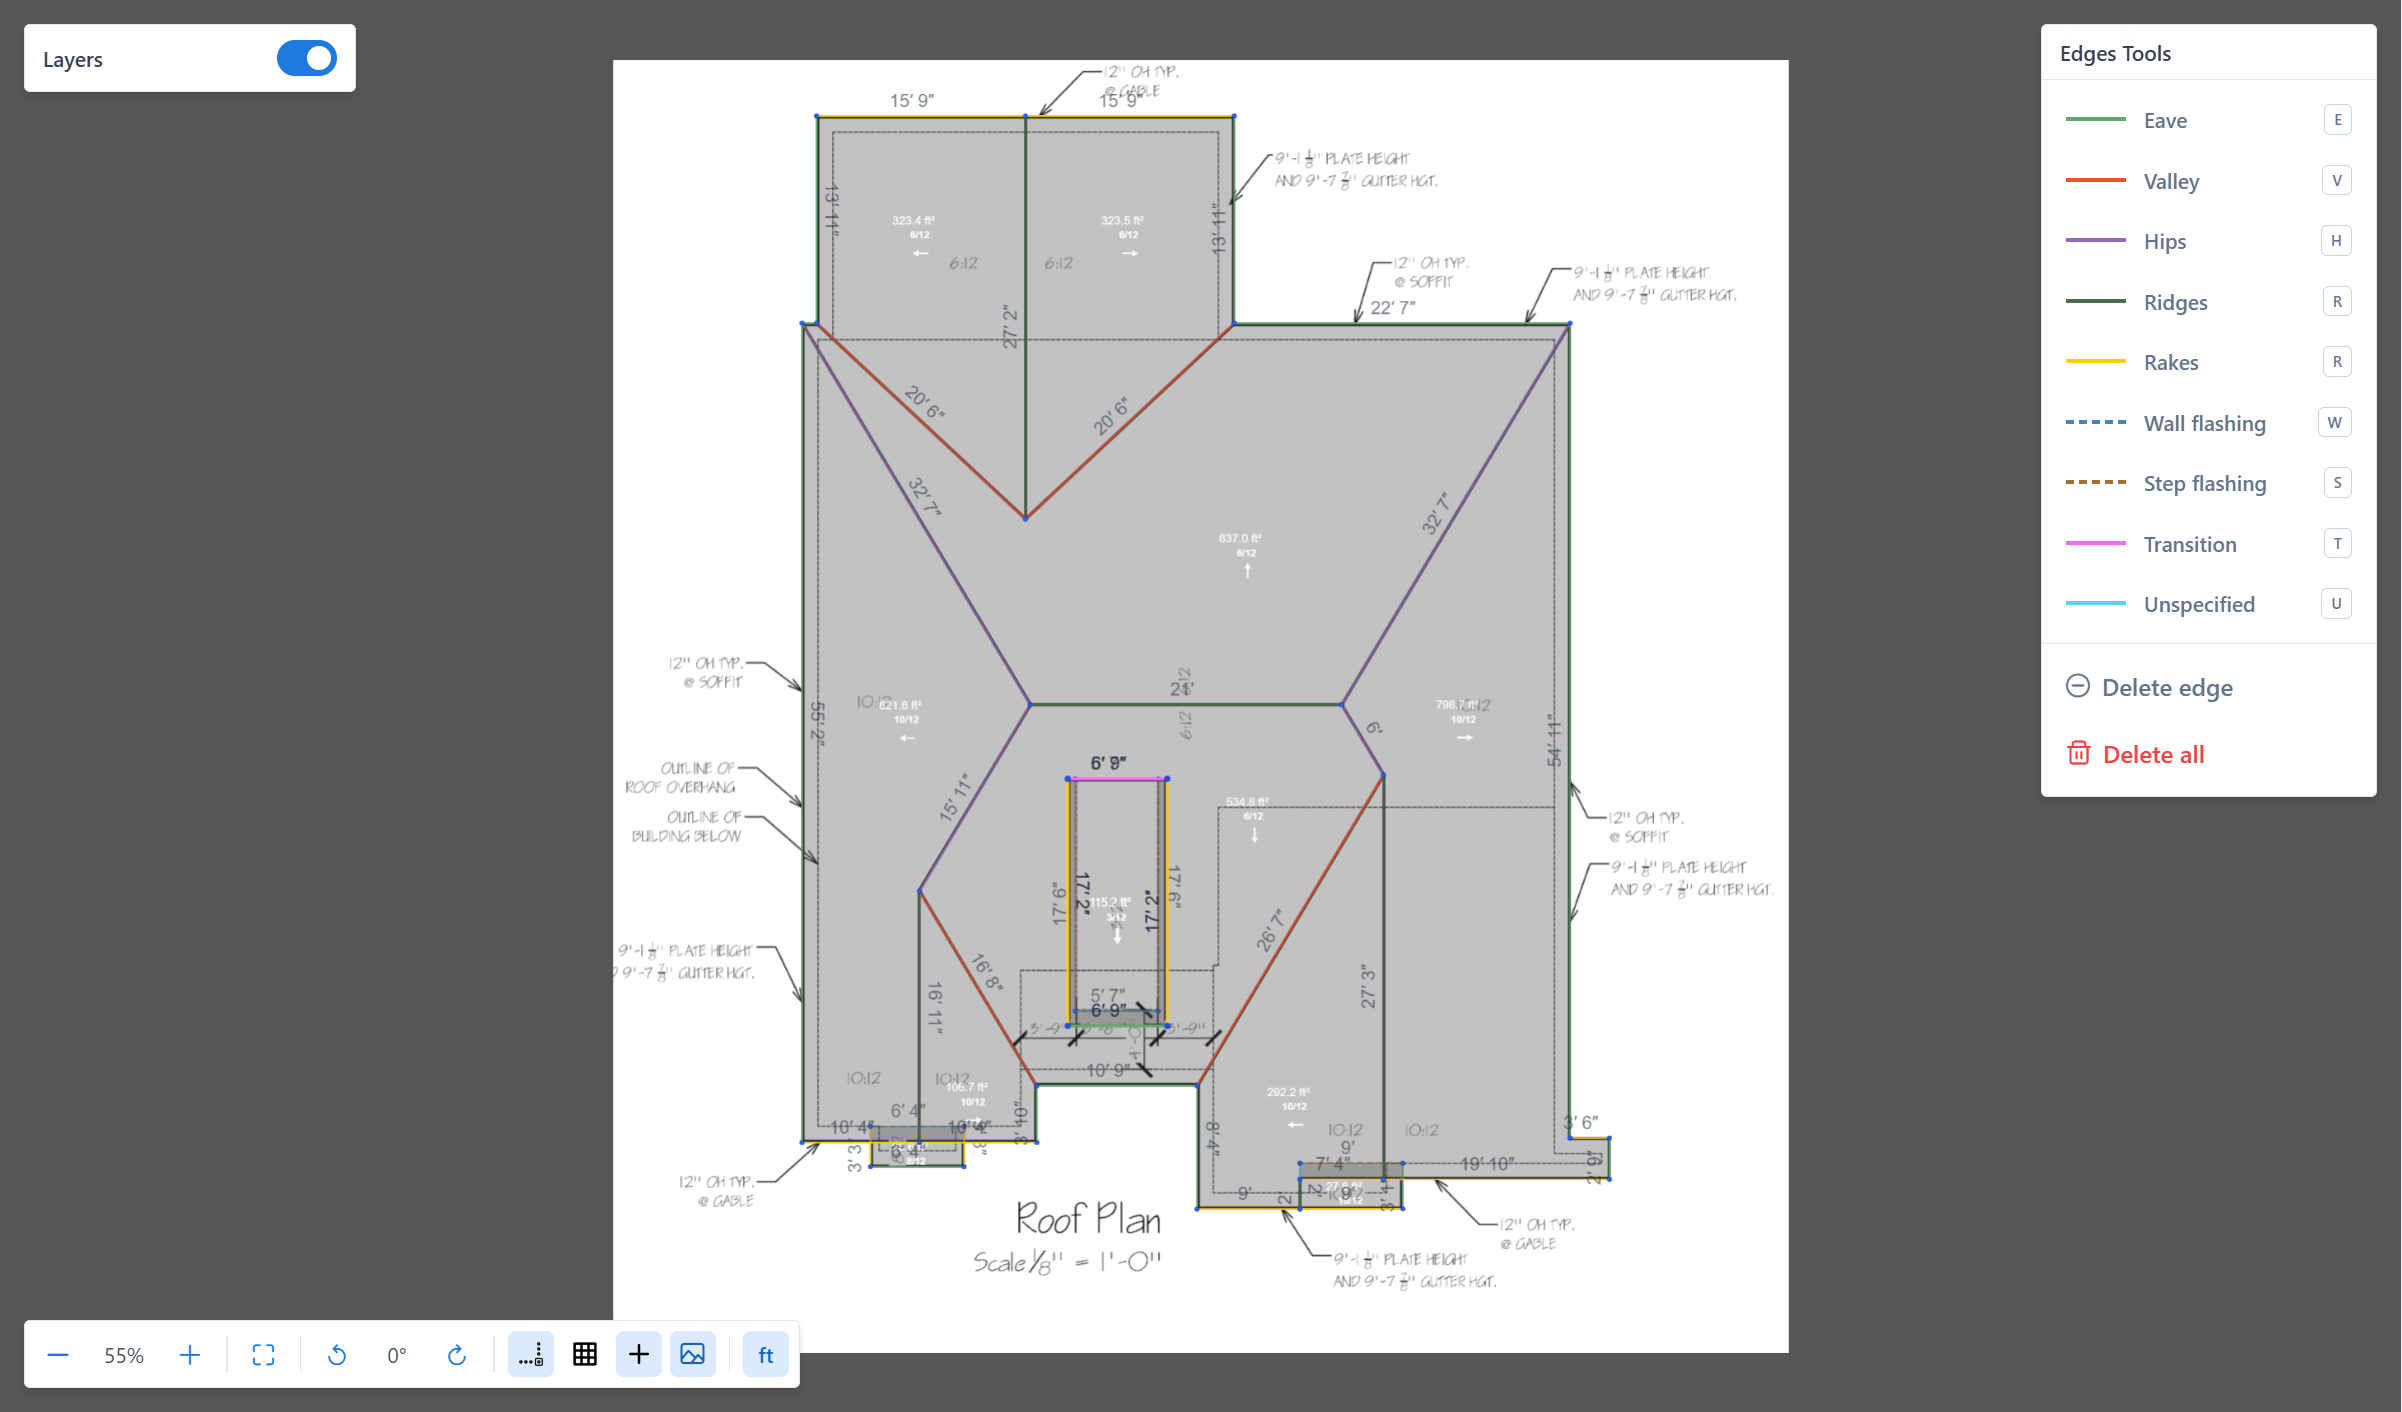
How to classify edges
Open the Edges panel, select a type (or use its keyboard shortcut), then click the edges you want to classify.
See: Classify edges for the step-by-step workflow and shortcuts.
Recommendations
- Classify edges after you finish tracing a roof section, not during drawing.
- Start with the most obvious types — eaves and ridges — then fill in hips, valleys, and rakes.
- If a slope direction arrow doesn't appear on a facet, make sure every edge around it is classified and the facet has pitch set.
- Leave nothing as
unspecifiedin a completed project.
What to read next
- Edges and facets
- Layers
- Classify edges — the hands-on workflow
- Set pitch — slope direction is derived from classified edges