Upload a PDF or image
Start from a PDF plan or an image, crop the usable area, and prepare the project for tracing.
Step-by-step guides for uploading a PDF or image, setting scale, tracing geometry, and generating reports.
Roof Layout Studio is built around one main workflow: import a PDF plan or image, define scale, trace the roof geometry, and generate a report from the resulting layout.
The main editor screen combines:
Open a new project, upload a PDF or image, and crop the roof plan area you want to work with.
Set the scale so the editor can convert traced geometry into usable measurements.
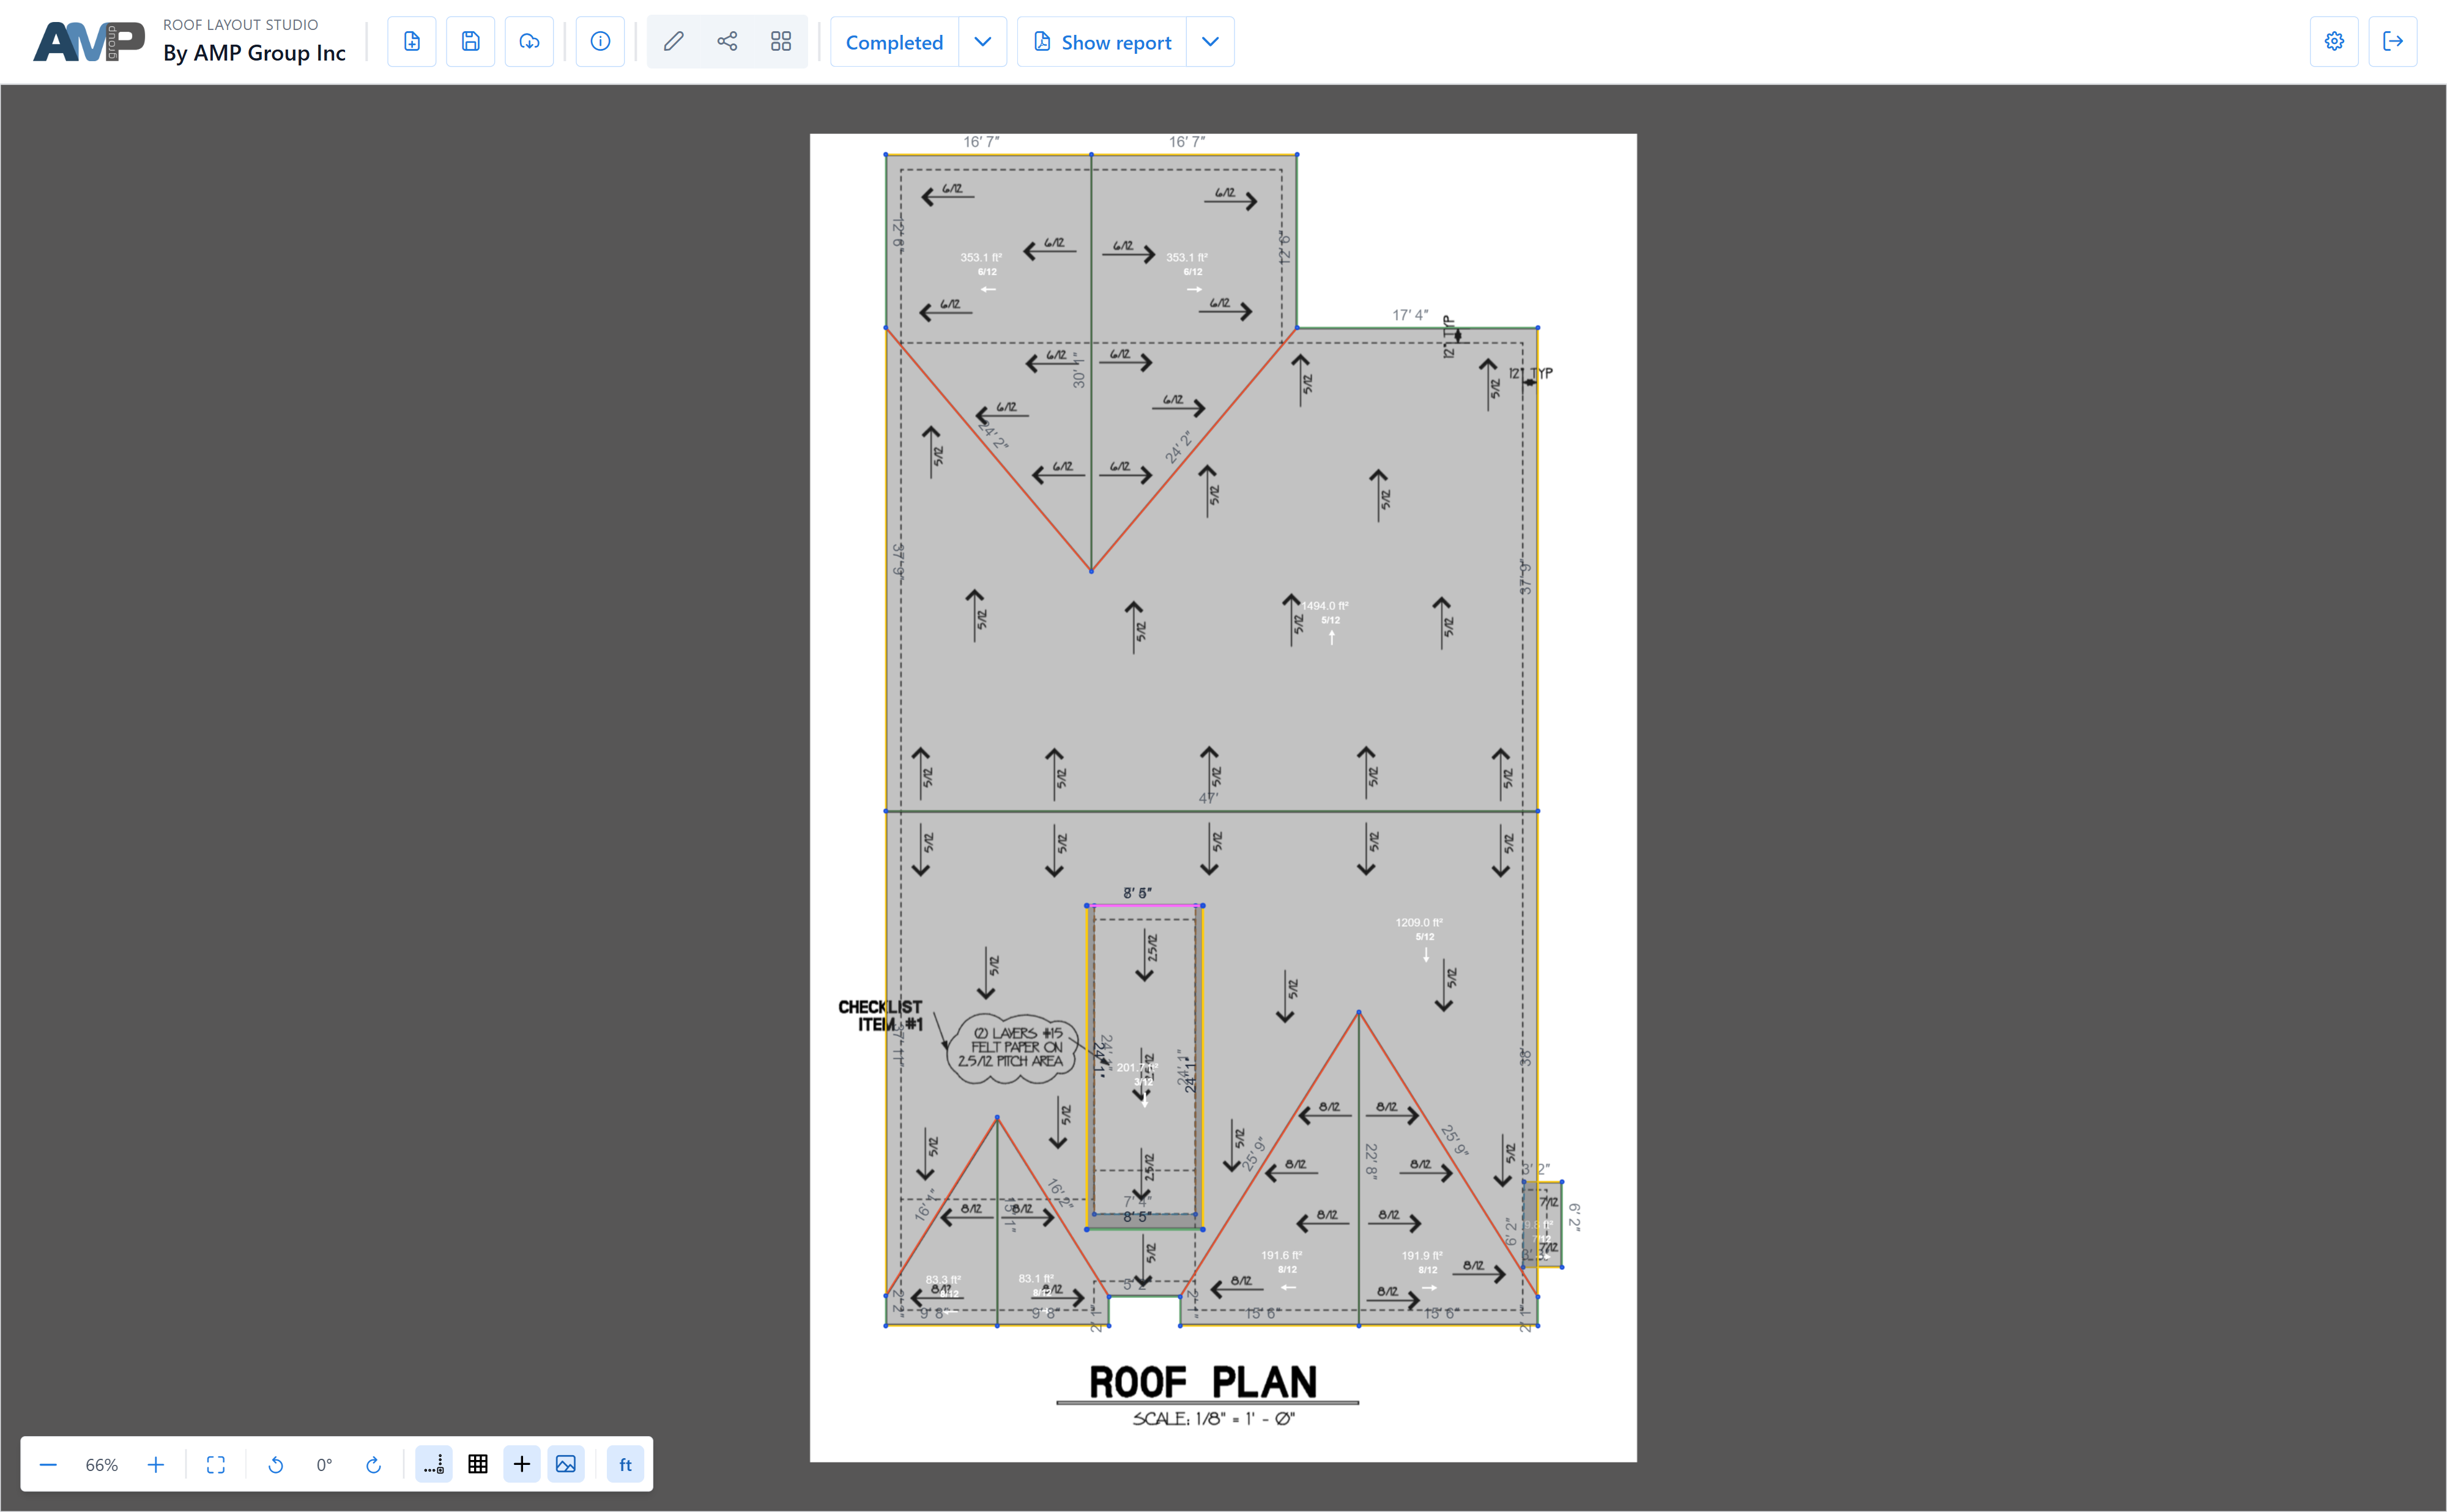
Use the editor to create and refine roof edges and facets, keep layers organized, and review the plan directly on the canvas.
Save the project, reopen it later if needed, then generate, review, and share the report.
The next documentation pages will focus on editor basics, geometry workflows, reports, and saved project handling.