Set Pitch
Pitch is the slope of a roof facet — how steep it is. Pitch is required for accurate area, slope-factor, and report calculations.
This workflow explains how to assign and adjust pitch for roof facets using the Facets panel.
What pitch represents
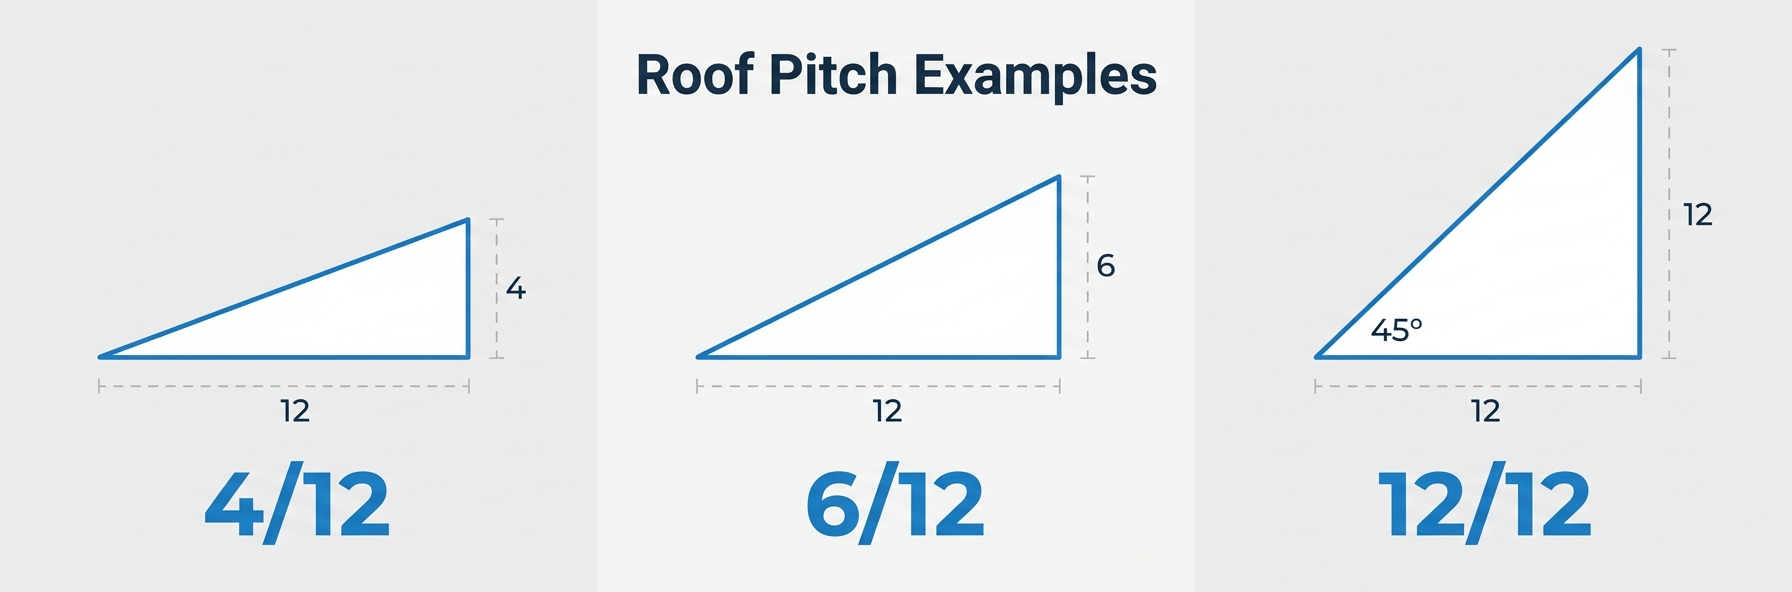
Pitch is a ratio of rise over run:
4/12— 4 units of rise for every 12 units of horizontal run (shallow slope)6/12— common residential pitch12/12— steep 45° slope0/12— flat roof
The pitch determines how much larger the real (with slope) area is compared to the flat plan area.
Enter Facets mode
Open the Facets panel by clicking the facets icon at the top right. The Facets panel does not have a keyboard shortcut in the current version.
Assign pitch to a facet
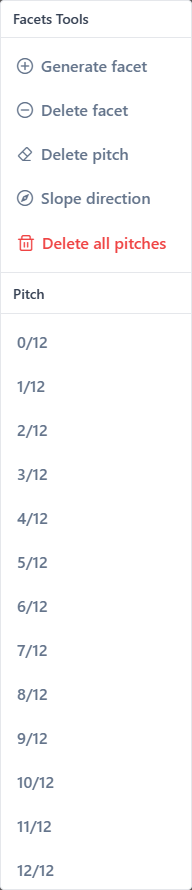
- Pick a pitch value from the panel — it becomes the active pitch.
- Click a facet on the canvas. The pitch label appears inside the facet.
- If the facet has classified edges, a slope direction arrow also appears.
You can keep clicking other facets to apply the same pitch quickly.
Custom pitch values
If the preset list doesn't contain your value:
- Click the custom pitch field in the panel.
- Type your rise (e.g.,
5.5). - Press
Enterto activate — it becomes the current pitch.
Custom pitches use decimals. 5.5/12, 2.25/12, 10.75/12 — all valid.
Slope direction
Once a facet has pitch and its edges are classified, the app infers slope direction automatically — from the ridge toward the eave. This is shown as an arrow inside the facet.
Override slope direction manually
If the auto-detected direction is wrong (for example, unusual roof geometry), you can set it manually:
- In the Facets panel, click Set Slope Direction (compass icon).
- Click the facet you want to modify.
- Click the edge that represents the eave (the lowest edge where water flows off).
The slope direction becomes perpendicular to the clicked edge, pointing away from the facet center.

Manually set directions stay fixed — edge classification changes later won't override them.
Reset to automatic
Re-assign pitch to the facet (click the same or a different pitch). This restores automatic direction detection.
Clear pitch
To remove pitch from a facet, pick Clear pitch in the panel and click the facet. The pitch label and arrow disappear.
To clear pitch for all facets on the current layer, use Clear all pitches. A confirmation dialog appears.
Flat roofs (pitch 0)
For flat roofs, assign 0/12. The slope factor is 1:1 (flat = real), and no arrow is drawn.
INFO
A flat roof facet still needs its edges classified for the report to list eaves and other boundary lengths correctly.
Viewing area results
With pitch assigned, each facet shows:
- flat area — the plan projection (for reference)
- real area — with slope applied, what shingles cover
Both values appear in the facet label and the final report.
See Measurements for how the two areas are calculated.
Tips
- Identify the main pitch of the roof first and apply it to all primary facets.
- Secondary structures (dormers, porches) often have different pitches — check carefully.
- If a facet's slope direction looks wrong, make sure all bordering edges are classified before overriding manually.
- Use keyboard shortcuts for common pitch values (if available in your version — see Keyboard shortcuts).
Common issues
No slope arrow appears after I assign pitch
- Some facet edges are still
unspecified. Classify them (at minimum: eave or ridge). - Pitch is
0/12. Flat roofs don't show an arrow.
The arrow points the wrong direction
- Use Set Slope Direction mode to override manually by clicking the target eave edge.
Two neighboring facets should have the same pitch but look different
- One facet has automatic direction, the other has manual. Either reset both to automatic (re-assign pitch) or override both manually.