Edges and Facets
This page explains two core concepts of Roof Layout Studio: edges and facets. Almost everything in the editor is built on them, so understanding the difference helps you work faster and avoid common mistakes.
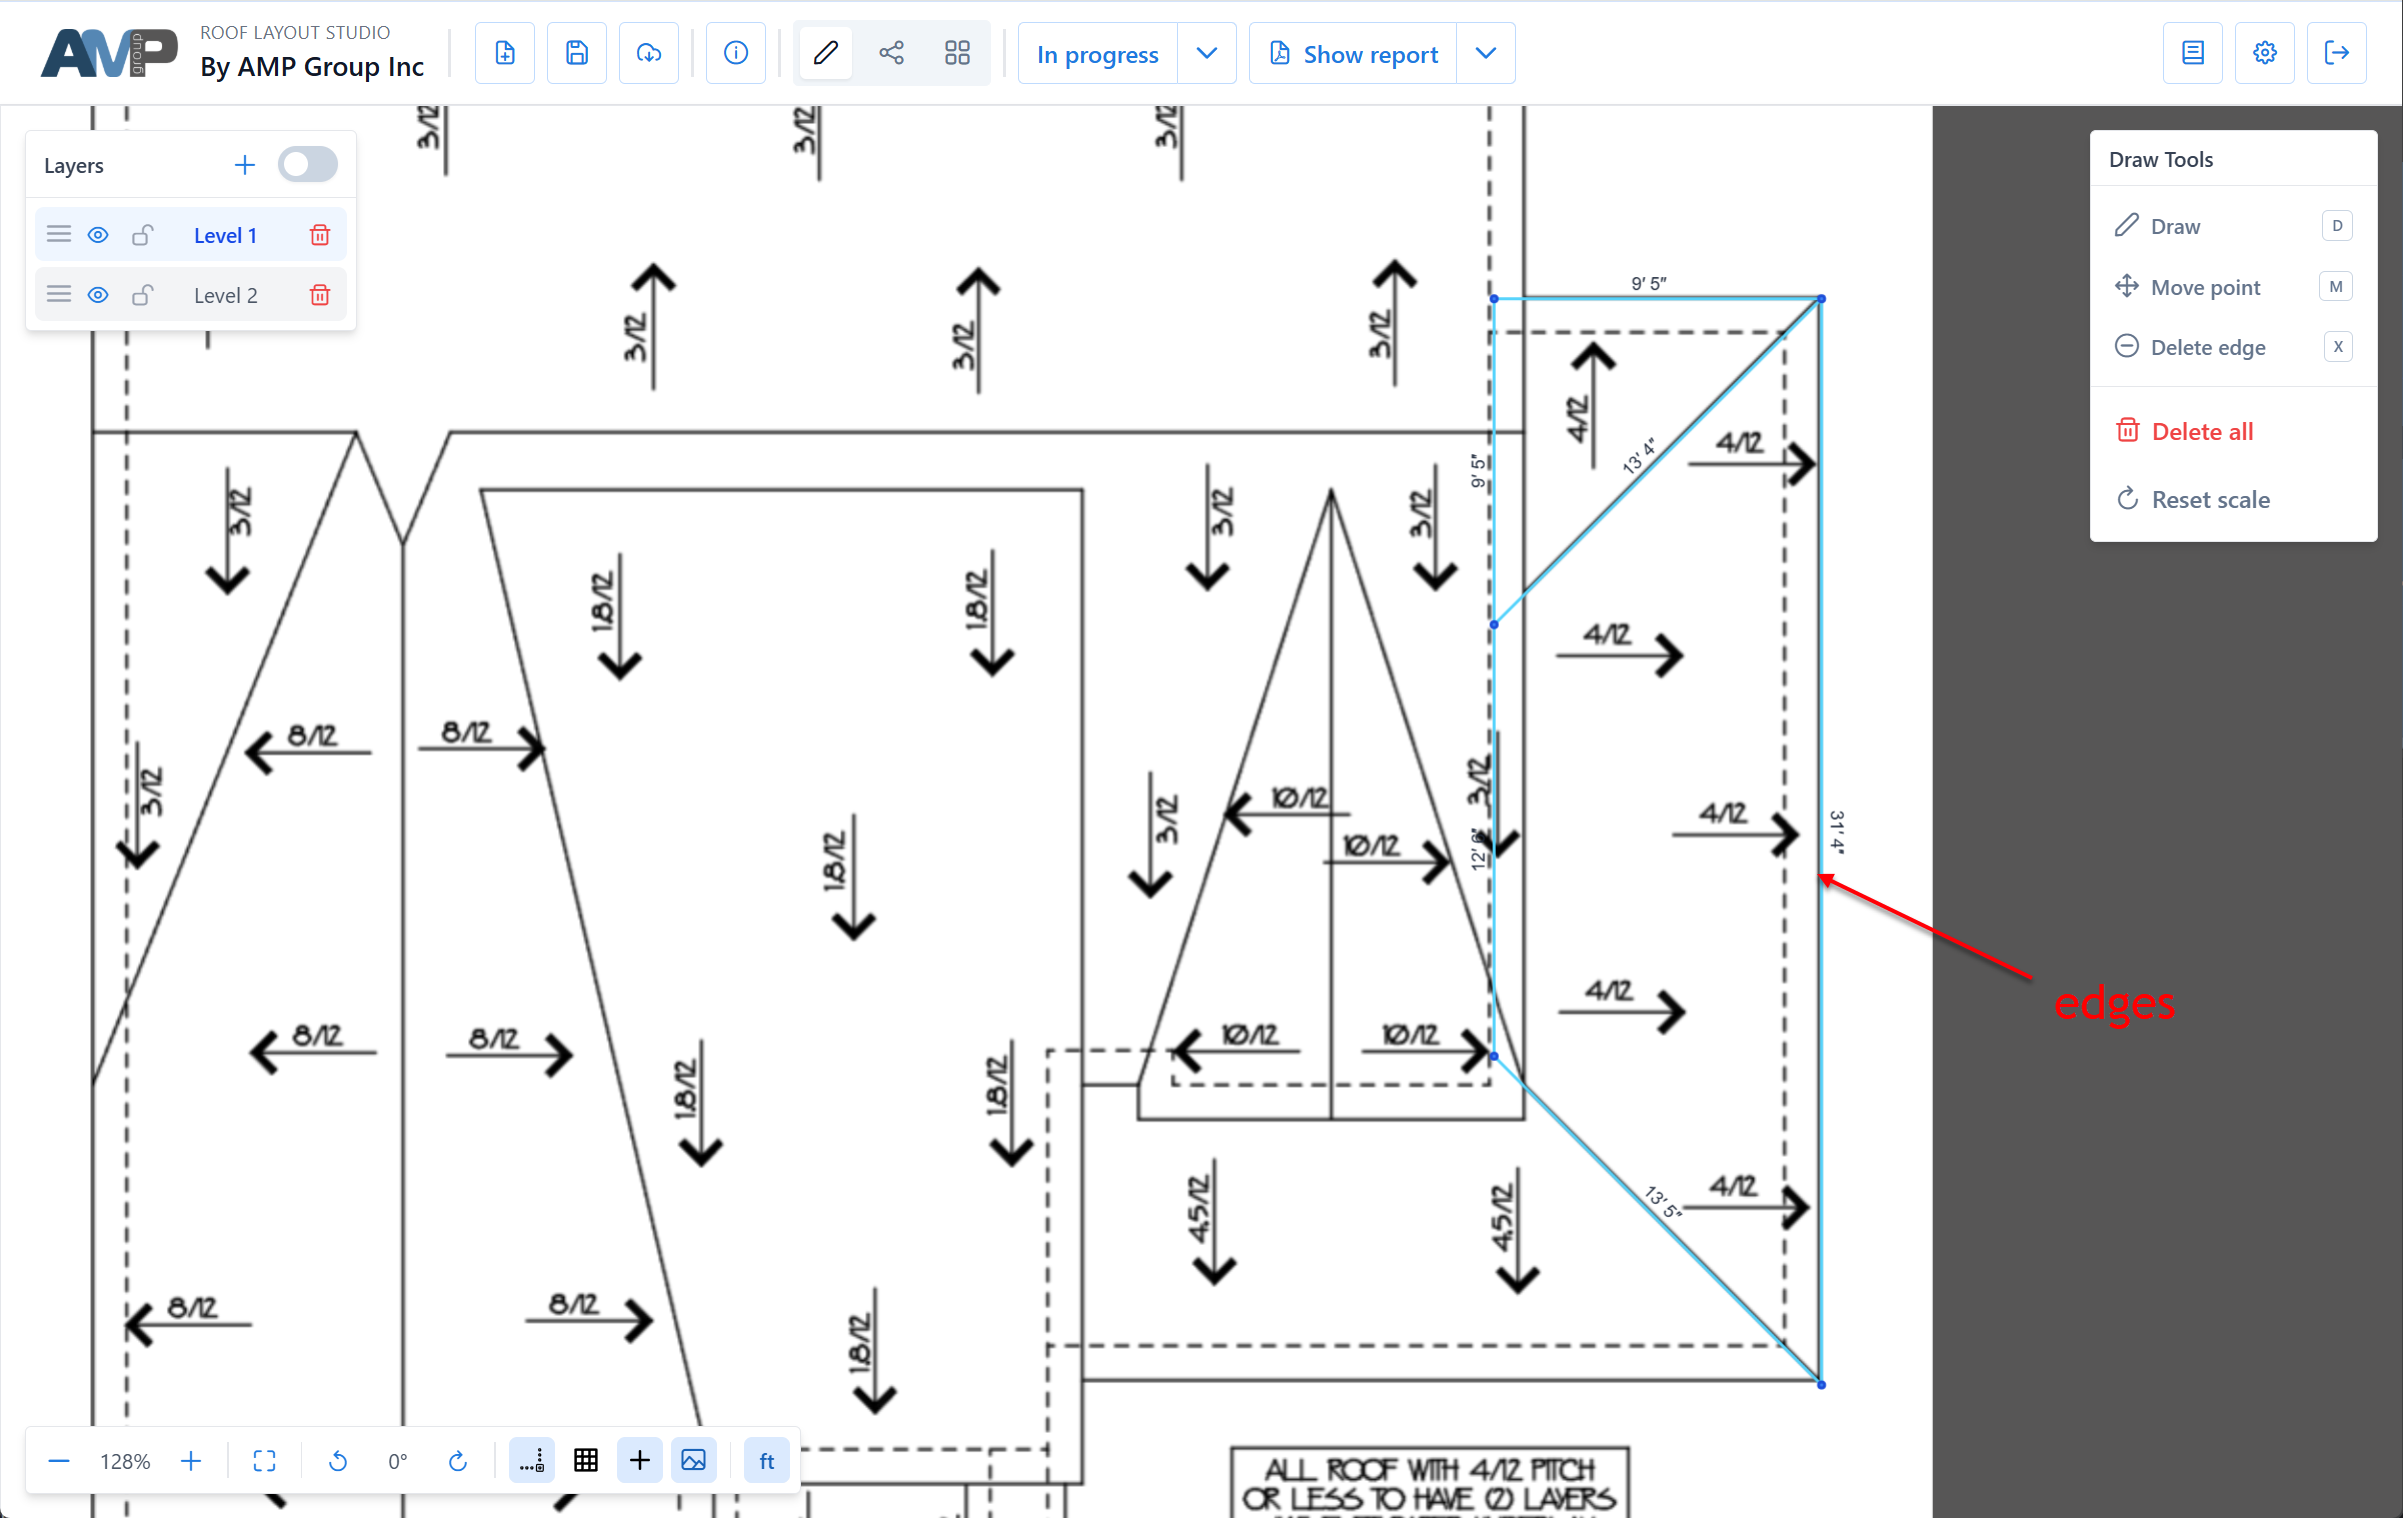
What is an edge?
An edge is a straight line segment between two points (nodes) on the plan.
Each edge represents a real roof line — an eave, a ridge, a hip, a valley, a rake, and so on. Edges are the building blocks you trace from the source image.
Every edge has:
- two endpoints (nodes)
- a type — eave, ridge, hip, valley, rake, flashing, or unspecified (see Edge types)
- a layer — which roof section this edge belongs to (see Layers)
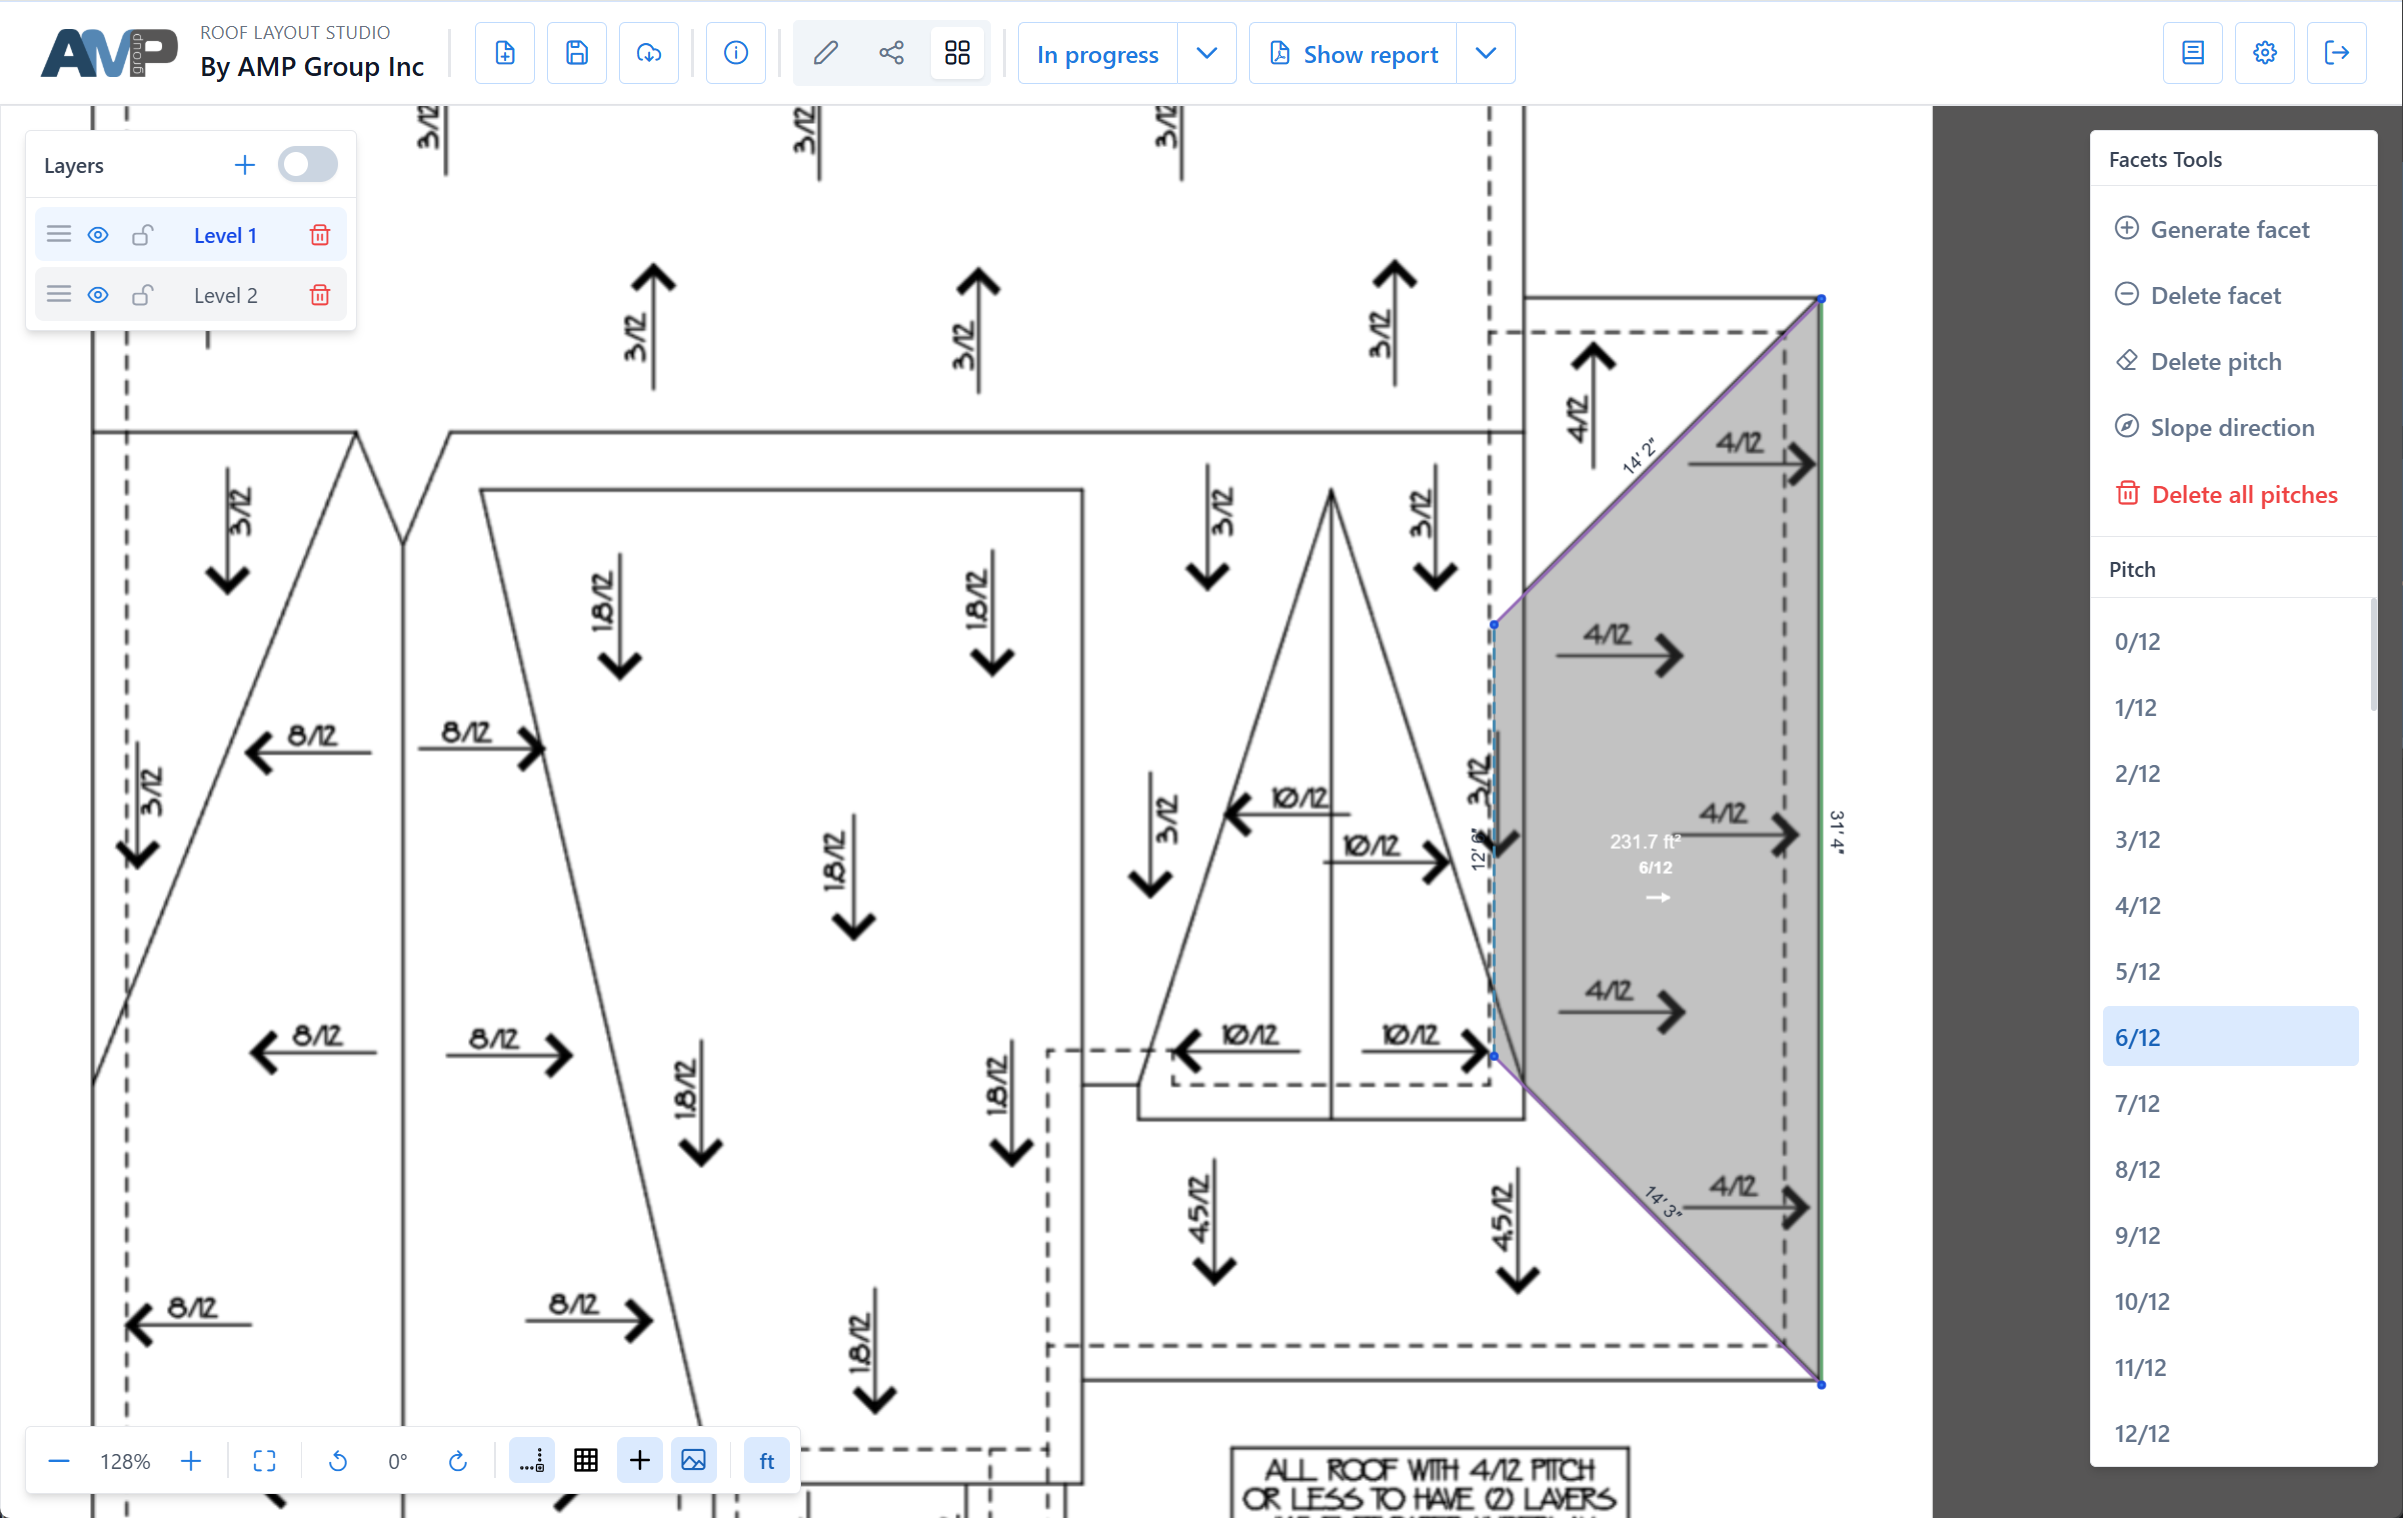
What is a facet?
A facet is a closed polygon bounded by connected edges. In real-world terms, it represents a single flat roof plane — one face of the roof.
Facets are detected automatically as soon as edges form a closed loop. You don't draw facets directly — you draw edges, and the facets appear.
Every facet has:
- a boundary — the edges that enclose it
- an area — calculated from the scale
- a pitch — the slope (assigned by you in the Facets panel)
- a slope direction — where water flows (calculated from edge types, or set manually)
How edges become facets
A facet appears when:
- Edges form a closed loop (each vertex connects to exactly two edges in the loop).
- The loop encloses an area (is not a zero-width line).
- All edges of the loop belong to the same layer.
- The Facets panel has been opened at least once — this enables automatic facet detection for the current layer.
If any of these conditions is missing, the facet won't be detected.

The Facets panel "activates" detection
Facet detection is off by default in a fresh project. It turns on the first time you open the Facets panel — at that moment the app scans the current layer for closed loops and enables auto-detection from then on.
This means:
- Before the first Facets panel open: no facets appear, even on closed loops. The geometry is stored — the loops are just not rendered as facets yet.
- After the first Facets panel open: every future change (drawing a new edge, closing a loop, deleting an edge) triggers a re-scan automatically.
- Per layer: auto-detection is enabled per layer — opening the Facets panel on
Level 1doesn't activate it forLevel 2. Switch toLevel 2and open the Facets panel once to activate it there too.
Recommendation
After drawing the first closed loop in a layer, open the Facets panel once. The facet appears, and auto-detection stays on for the rest of your session.
INFO
If a facet doesn't appear where you expect:
- Check that you have opened the Facets panel at least once for the current layer.
- Check each edge of the boundary carefully — a common cause is a tiny gap between two edges that look connected but are not snapped to the same node.
- Check that all boundary edges belong to the same layer.
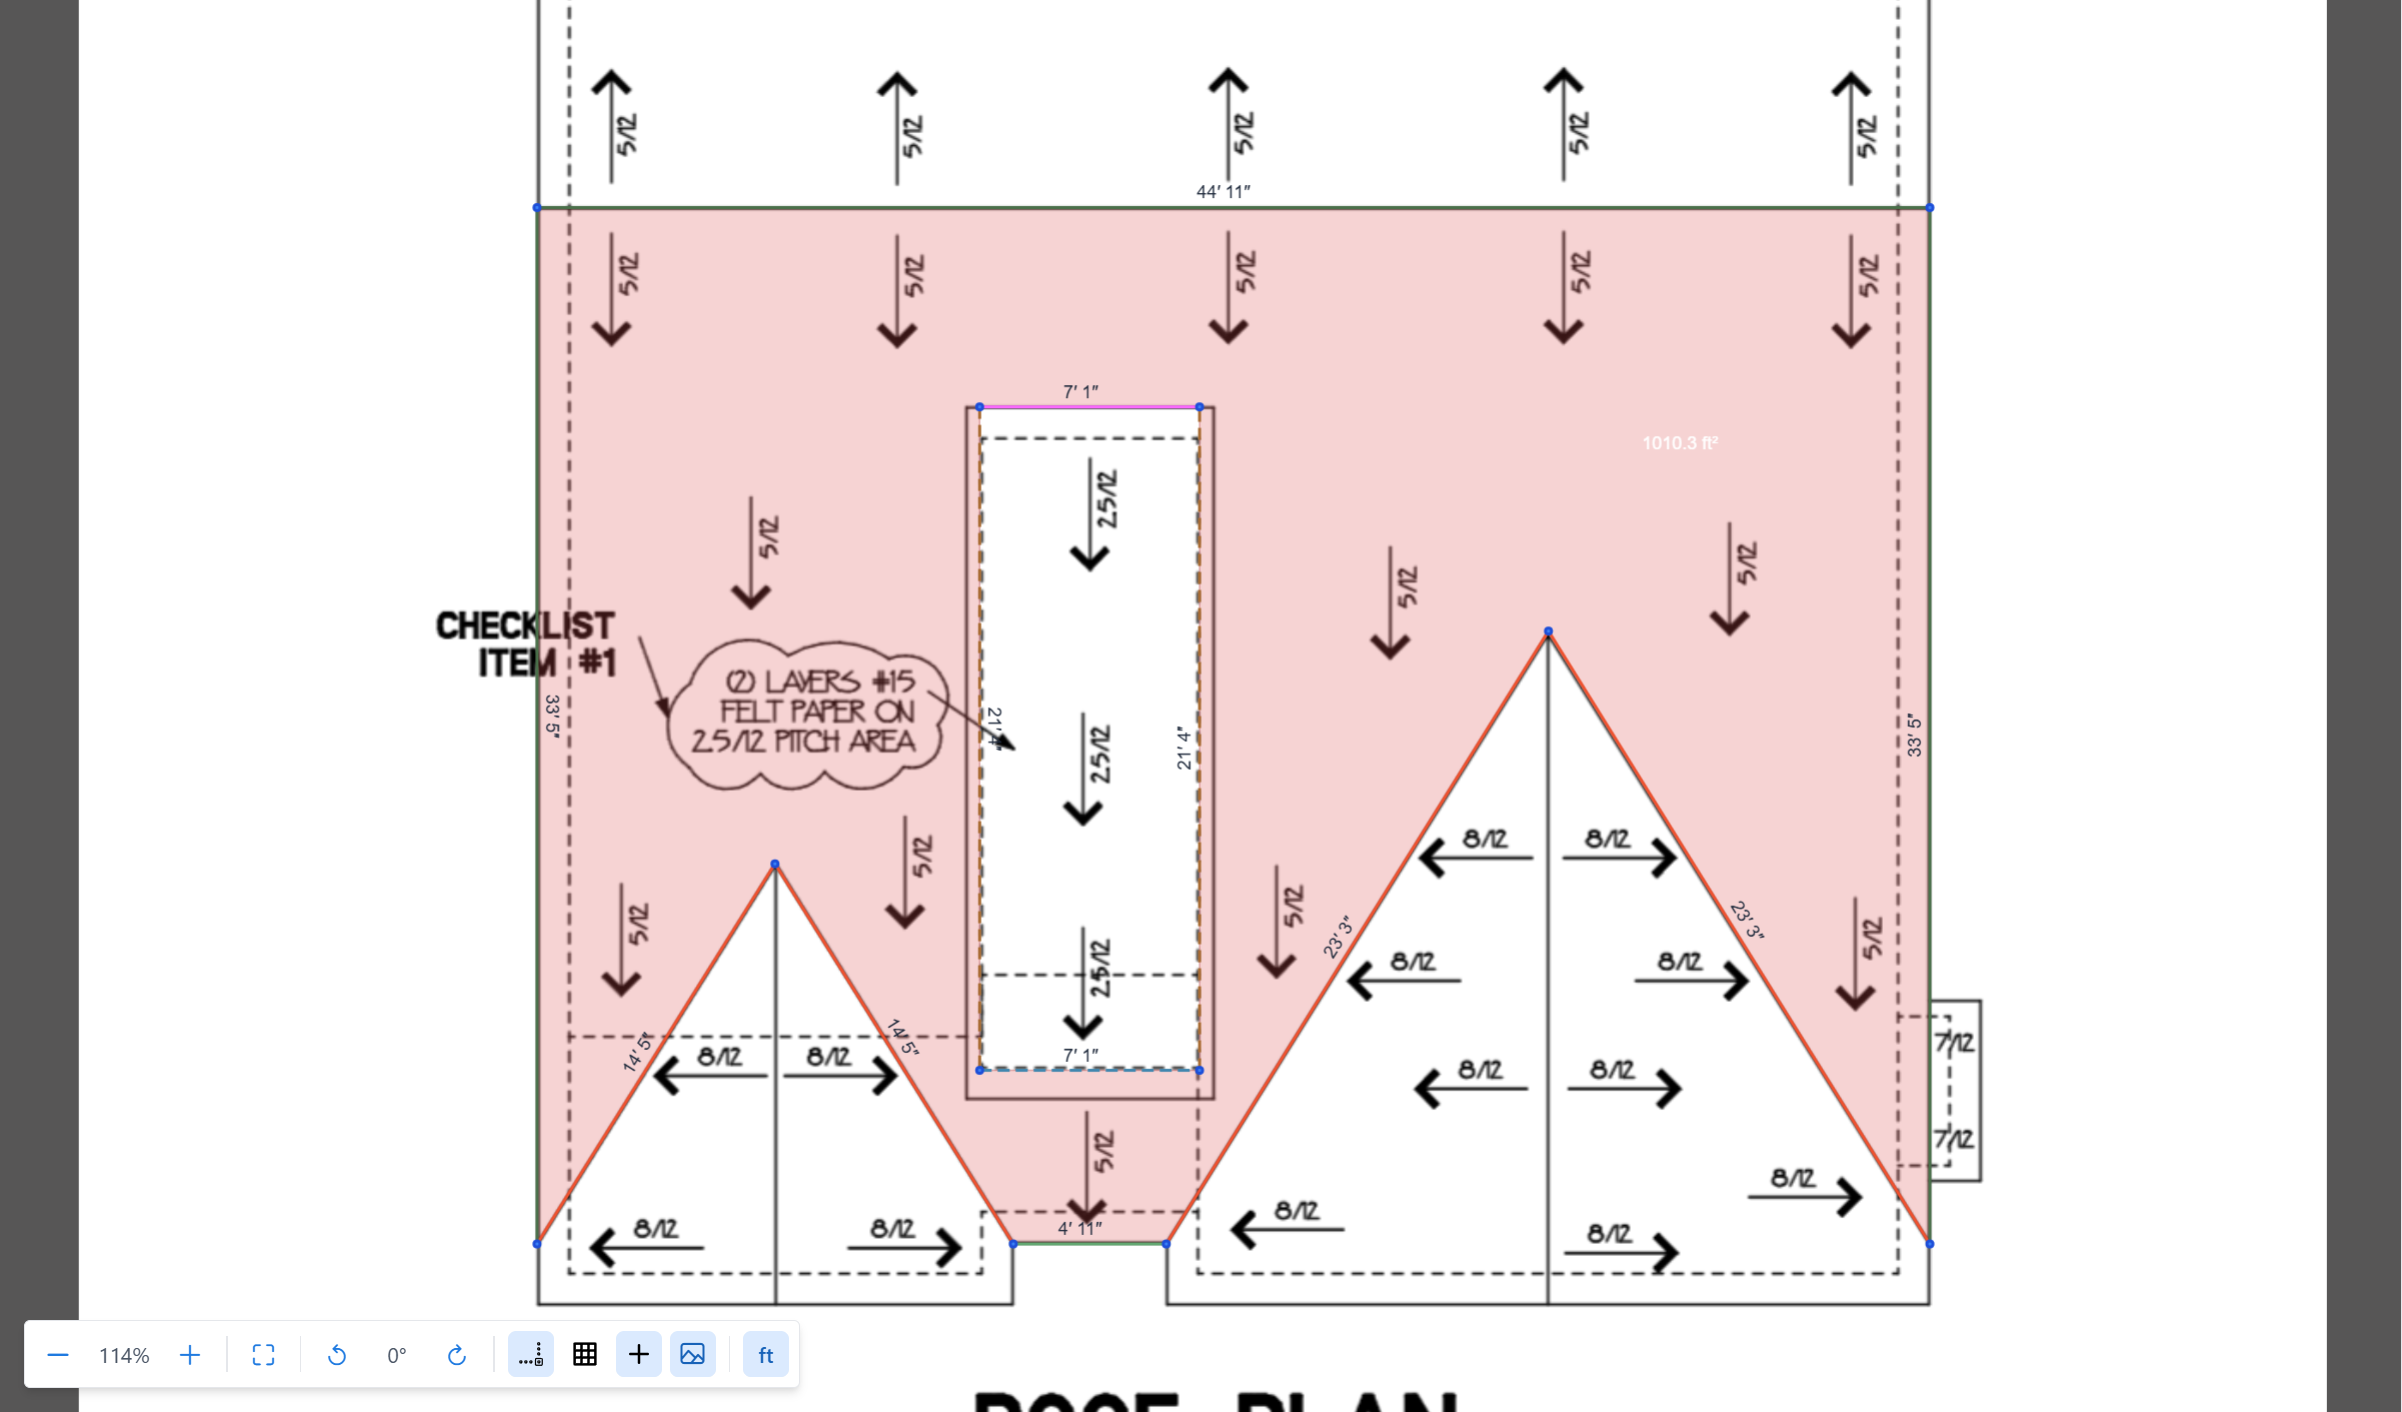
Facets with holes
A facet can contain holes — cut-outs for features like chimneys, skylights, or vents.
How hole behaviour works
As soon as you draw a closed loop fully inside another closed loop on the same layer, the outer facet's area is automatically recalculated with the inner area subtracted.
At the same time, the inner loop also appears as its own separate facet on the canvas with its own area label.
This means after drawing an outer + inner loop, you have two visible facets:
- Outer facet — its area already equals
outer − inner(the hole is applied). - Inner facet — its area equals the inner area.
If you sum the two labels you get the full outer area (the inner is counted both as +inner in its own facet label and −inner as a hole in the outer). This is usually not what you want for a chimney or skylight.
Turning the inner facet into a clean hole
To have just the hole (and stop counting the inner area as roof):
- Switch to the Facets panel and activate Delete facet mode.
- Click the inner facet. It's removed from the scene.
After deletion:
- the outer facet's area doesn't change (the hole was already applied)
- the inner facet is gone — no more separate area label for it
- the total roof area on the report drops by the inner area (because only the outer — already with hole subtracted — is counted now)
This is the correct state for skylights, chimneys, and vents.
Recommendation
After drawing a chimney or skylight outline inside a roof facet, always go to the Facets panel and use Delete facet on the inner loop. Otherwise the inner area stays as a separate facet and is counted in the report as roof.
When to keep the inner facet
Leave the inner as a facet (do not delete it) if the inner area is a real roof section on top of a larger one — for example, a cupola, a small roof over a bay window that sits on top of the main roof, or a nested dormer footprint.
In that case:
- outer has
holes = [inner]so its area excludes the covered part — which is correct, because the main roof underneath isn't visible there - inner is a real facet with its own pitch and material — and is counted normally
Restore a deleted inner facet
If you used Delete facet by mistake:
- Make sure the boundary edges of the inner loop are still in place.
- Switch to the Facets panel and activate Generate facet.
- Click inside the former hole. The inner facet is restored.
Area calculation
Facet area depends on:
- plan area — the flat area of the polygon on the plan, converted using the scale
- pitch — how steep the facet is
- real area — plan area corrected for the slope, which is what shingles actually cover
You will see both flat and real (with pitch) areas in the editor labels and in the final report.
INFO
If scale or pitch is missing, the area values will be incomplete or unreliable. Always set scale first, then pitch.
Common mistakes
The facet isn't shown
- The Facets panel was never opened for this layer — detection hasn't been activated. Open it once.
- The edge loop is open. Zoom in and check for small gaps between nodes.
- The edge is on a different layer (only edges on the same layer form facets together).
Two facets merged into one
- Two areas share edges, but there's no edge separating them. Add the dividing edge and the two facets appear.
I drew a chimney/skylight outline but the inner area is still counted in the report
- This is because the inner closed loop is treated as both a hole in the outer facet and a separate facet of its own. To have just the hole, open the Facets panel and use Delete facet on the inner facet.
- Both loops must be on the same layer. If they're on different layers, deleting the inner facet won't affect the outer — there will be no hole relationship between them.
The outer facet's area changed suddenly after drawing an inner loop
- This is expected. As soon as a closed loop is fully inside another one on the same layer, the outer's area is recalculated with the inner subtracted. If you didn't intend a hole, delete the inner edges (not the outer) to restore the outer area.
What to read next
- Edge types — how to classify edges and why it matters
- Layers — for multi-section roofs
- Draw edges — hands-on drawing workflow
- Set pitch — assign a slope to a facet