Editor Overview
This guide explains the main parts of the Roof Layout Studio editor: the toolbar, the canvas, and the side panels. Read this after creating your first project — it gives you the map you need before moving to detailed workflows.
The editor at a glance
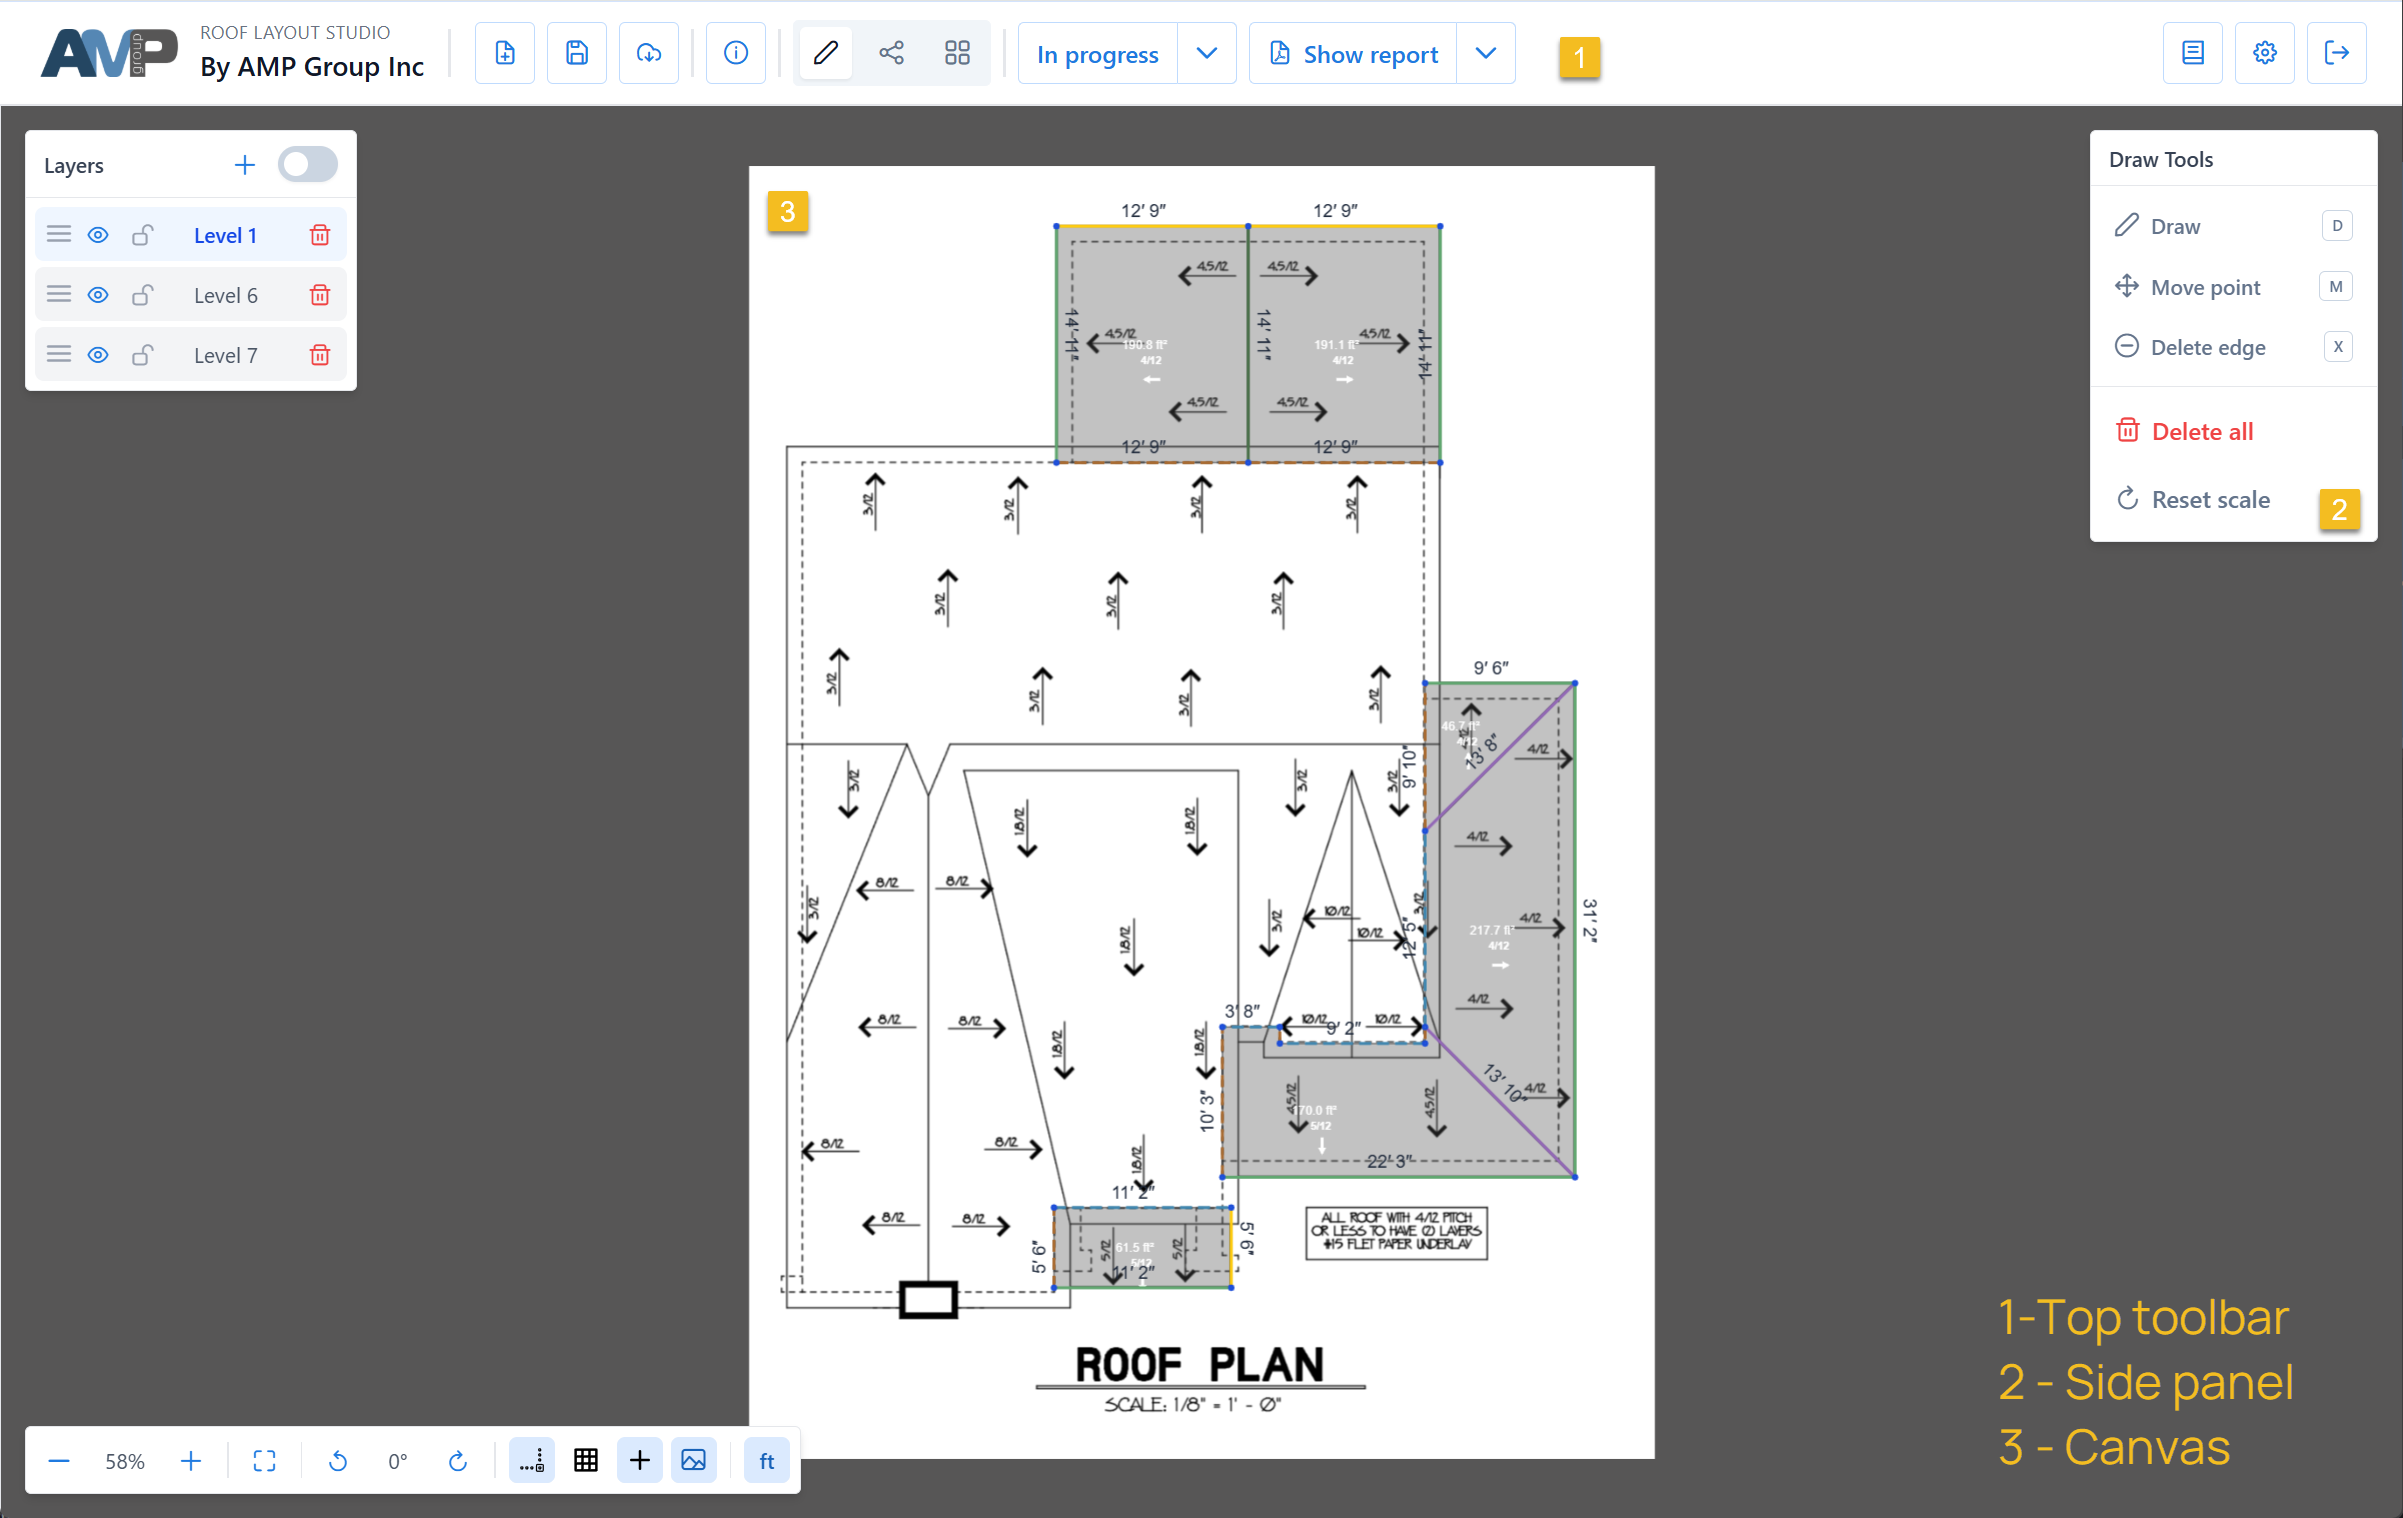
The editor has three functional areas:
- top toolbar — project, report, status, and account actions
- canvas — the main work area where you see the plan and trace geometry
- side panels — mode-specific tools for drawing, edges, and facets
Top toolbar
The toolbar at the very top of the screen groups project-level actions.

From left to right it typically includes:
- New project, Save, Open — project lifecycle actions
- Project information — name, address, preparer, status metadata
- Status — mark the project as
in progressorcompleted - Report — generate, preview, or download the PDF report
- Documentation & Settings — this help center, language, and units
- Logout — sign out of the account
Recommendation
Save the project regularly while tracing. Autosave runs in the background, but a manual save after a major change is a good habit.
Canvas
The canvas is the central work area. It shows the plan image, any traced geometry, and visual guides that help place points precisely.
What you interact with on the canvas:
- nodes — points where edges meet
- edges — lines between nodes
- facets — closed polygons that form roof planes (detected automatically when loops of edges are closed)
- scale indicator — a small panel in the bottom-right that shows current zoom and scale settings
Navigation
- Pan: left-mouse drag on empty canvas. In
Move pointsub-mode, use middle-mouse drag (or left-drag in empty areas). - Zoom: mouse wheel (or pinch on trackpad).
- Rotate plan: use the rotate controls in the bottom-right view toolbar if the source is oriented incorrectly.
Side panels
On the right side the editor shows one of three panels, depending on the selected mode.
Draw panel
The entry point for creating and moving nodes and edges. Sub-modes:
- Draw edge — click to place nodes and connect them with edges
- Move point — drag existing nodes
- Delete edge — click an edge to remove it
See: Draw edges
Edges panel
For classifying edges by type — eave, ridge, hip, valley, and so on. Each type has a color and is used to calculate slope factors and report measurements correctly.
See: Edge types and Classify edges
Facets panel
For assigning pitch to roof planes and editing slope direction. Facets are detected automatically from closed edge loops.
See: Edges and facets and Set pitch
Switching between modes
You can switch modes at any time:
- click the mode icons in the top-right area (above the right panel)
- or use keyboard shortcuts to jump into a specific tool:
Denters Draw edge mode (opens the Draw panel), an edge-type letter likeE/V/H/Ropens the Edges panel with that type selected. The Facets panel has no hotkey — open it by clicking its icon. See Keyboard shortcuts for the full list.
Switching modes never loses your work — traced geometry stays on the canvas.
Layers
Layers are the vertical stacking order of the roof — Level 1 is the lowest, layers above it stack on top. Roof planes that overhang other planes must go on a higher layer than what they overhang; non-overhanging planes can share a layer. The layer list is shown in the top-left area of the editor.
See: Layers for when and how to use them.